
How To Get AMAZING Northern Lights/Aurora Borealis Photos
Disclaimer: some of the links below are affiliate links, which means I may receive a small commission if you shop from those links. This commission helps support this website and Wandering Switchback on the whole. I greatly appreciate your support!
The next few nights are looking promising for more incredible Aurora Borealis action- as far south as Northern California and even Alabama, according to at least one source. So here is an overview to help you get the most out of your shots, whether you’re using a camera or your phone, including choosing where to go and what gear to use. Remember that your camera, even on your phone, will detect light you can’t see with the naked eye, so getting photos is even more exciting.
AURORA FORECAST: I use two apps to monitor the aurora forecast, and both of them are free. Aurora and Northern Light Aurora Forecast. The KP Index is what you may hear the most about, but what is more helpful is the solar wind Bz. The more negative, the better. If you really want to nerd out, higher solar wind speeds push the lights further south, and higher wind density leads to more colorful displays. You will also see a map of the probability of seeing the lights in real time. Screenshots of aurora maps and stats below are from these apps.

These are the current icons for the apps I mentioned

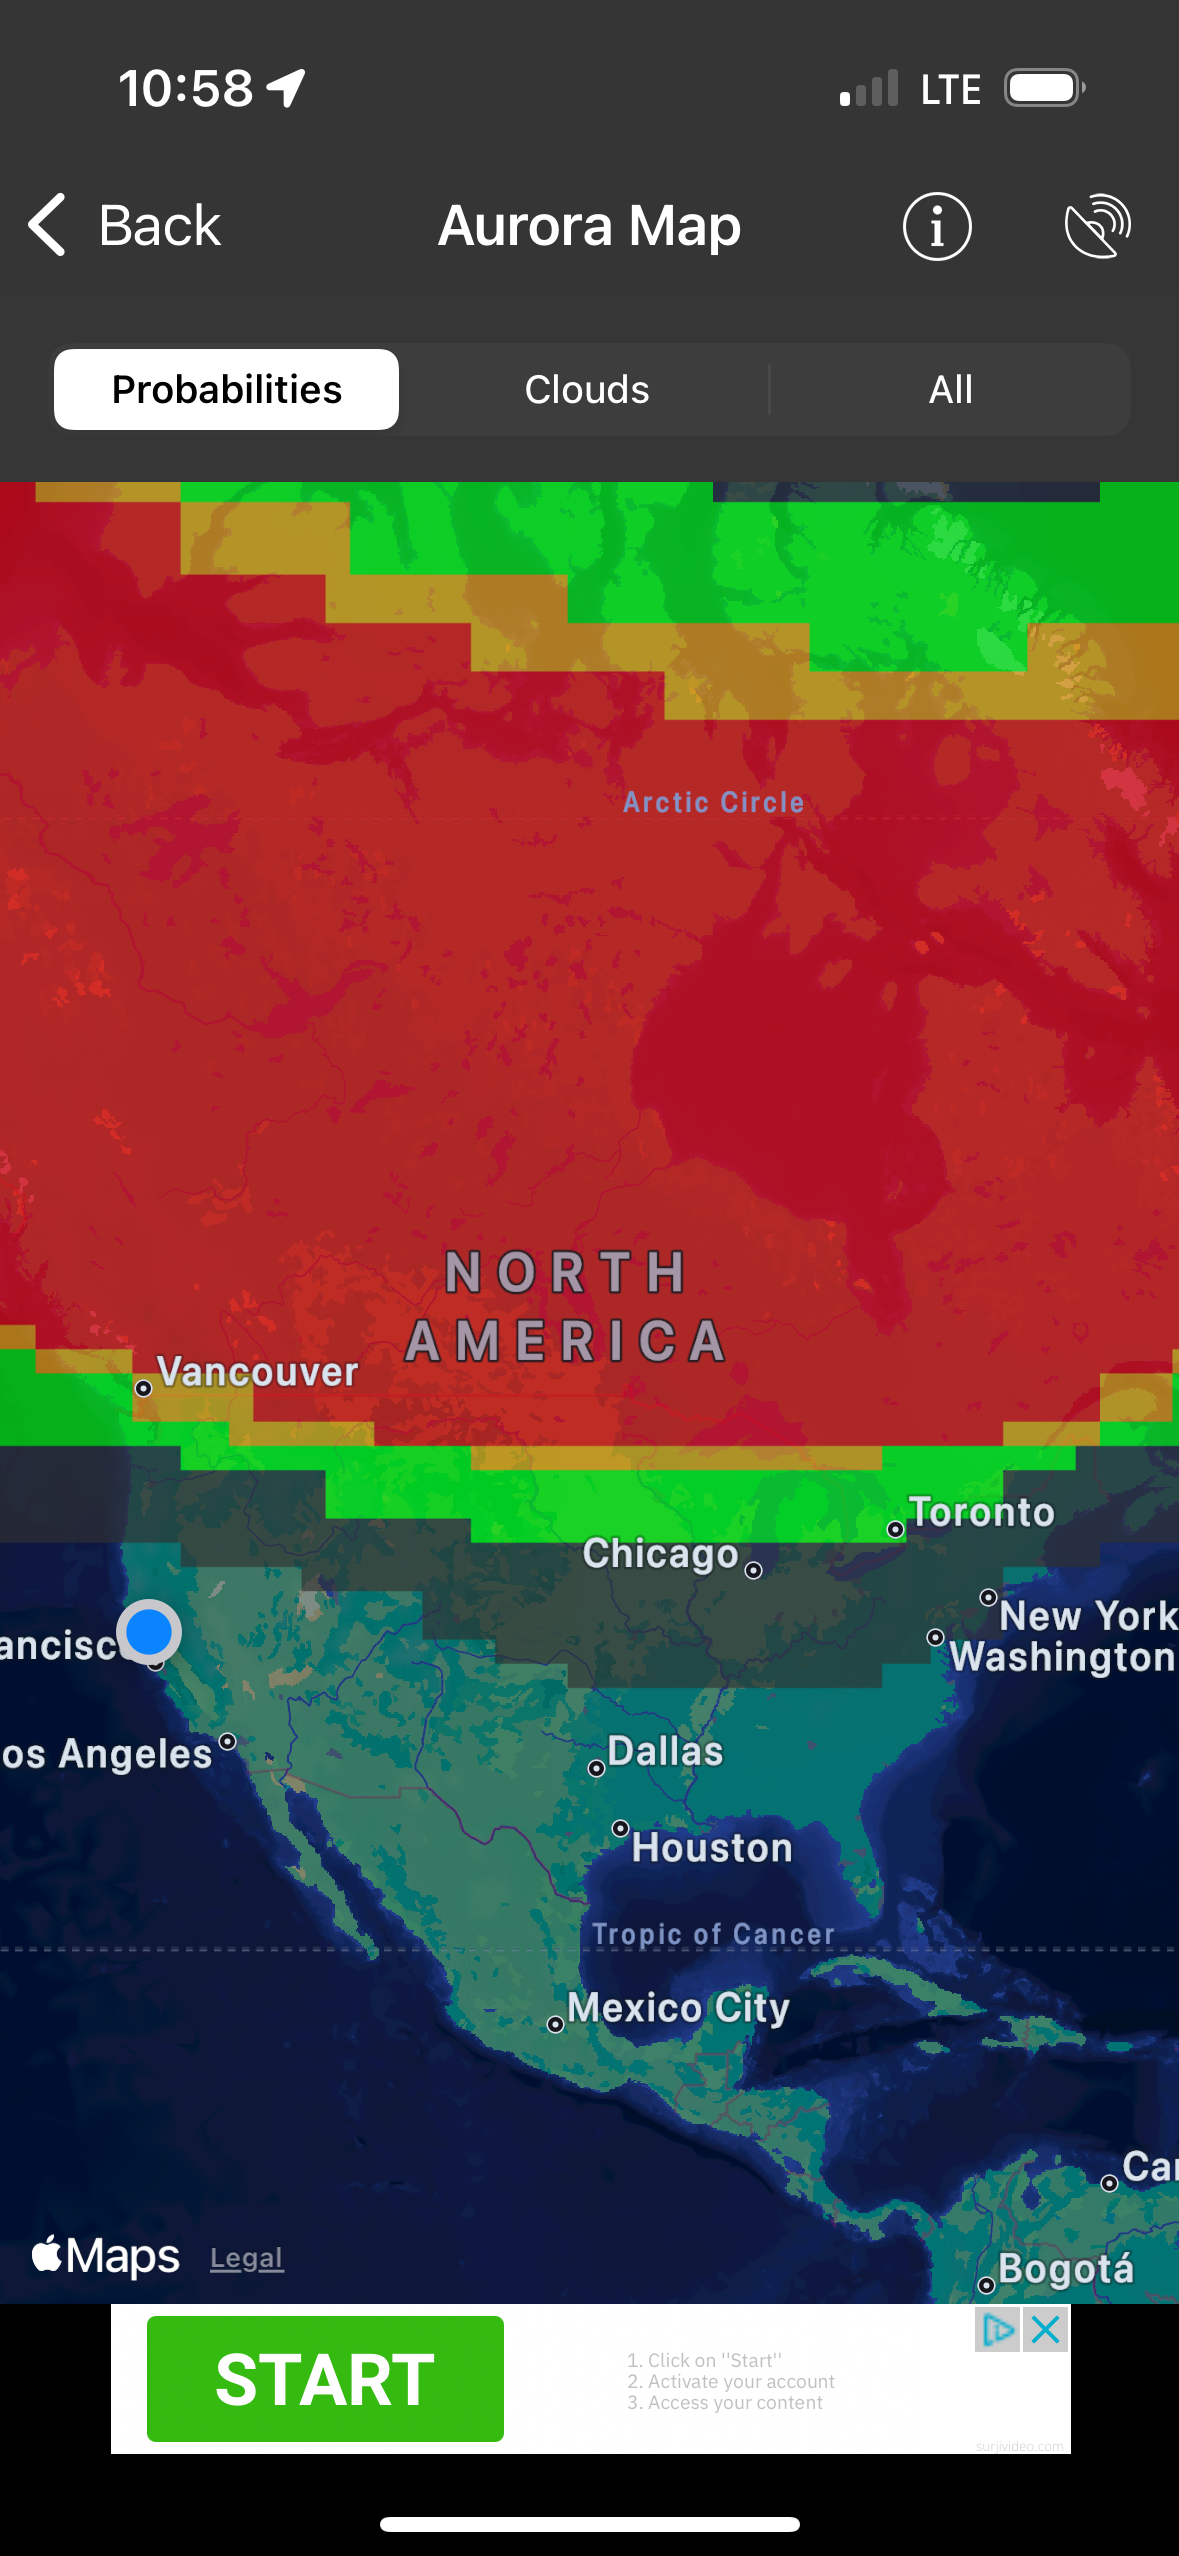
Northern Lights probability map 5/28/25. The red represents the highest probability of seeing the lights and the gray the lowest, but the lights may be visible for a couple hundred miles on the horizon outside of the gray zones, depending on the conditions.
LIGHT POLLUTION: Look at light pollution maps online. You can find them with a Google search. Look for the darkest skies you can. This is one I use, but the Planit Pro app is what I use on my phone (currently $9.99 one-time fee).

Light pollution map- the red areas are the most “polluted”, where the gray is the least. Don’t forget to consider light pollution to the north of where you’re viewing.
WEATHER FORECAST: Look at the weather forecast for cloud cover in and near that location, including to the north. Clearer skies will yield the best results. I like using Windy.com in addition to other radar maps.

Windy.com cloud map. Note that you can adjust the time and date along the bottom, and look at other weather elements on the right side.
LOCATION: Look at a topo map to find a place without obstructing hills to the north. This article will help if you’re not familiar with reading a topo map. You’ll want a clear view of the northern horizon, ideally one without a major city to the north, as city lights will be visible for over 100 miles. I use GaiaGPS for my topo (any topo map source will work), then confirm the view with Google Earth Pro (which usually but not always has a helpful ground view perspective). The Google Earth Pro app on my Macbook is more helpful than the website, in my experience. Try to select an interesting foreground, even if you can only get silhouettes. This makes your photos more visually appealing.

GaiaGPS showing topo lines

Google Earth Pro ground-level view
Get to your location early, especially if you’re unfamiliar with it or it’s easy to access. Easy to access places will be very busy if the forecast is promising, so secure your spot early. Look for places without trees or other obstructing objects, or at least with minimal obstructions, and away from lights. If you have to hike to it, even better.
If you can, try to get away from roads where headlights may interfere with your shots. If you need to be near a road, try to avoid being on the outside of a curve, and above all, get somewhere safe where distracted drivers won’t be likely to injure you. Busy roads may be a frustrating challenge with constantly changing light in your shots (ask me how I know), so try to find more rural side roads.
Take chairs, snacks, water, blankets, layers, headlamp (ideally with red light option), extra batteries and/or power banks, etc.
If you’re planning to take photos, whether with a camera or your phone, take a tripod. You’ll want your camera as still as possible for the best shots. If your camera has a flash attached, turn it off. Same with your phone.
PHONES: If you’re using your phone, most phone cameras will do all the hard work for you. iPhones will go into Night Mode automatically in a dark setting, but Androids may need to be switched into Night Mode. Also turn Live Mode off if it’s on. If your phone has the option for manual mode, or you have a third party app for it, you will have more control over the results if you turn it on and use the tips below for your settings.

Handheld with iPhone, 5/11/24, Mendocino County, California
LENS: If you’re using a camera, choose a wide-angle lens, so small mm number (ideally 28mm or less). Look for one with a small f number (f/2.8 or smaller number), or aperture, and with a manual focus ring.
My gear:
Sony A7Rv camera
Sigma DG DN 20mm f/1.4 Art lens
Magnus TR-17L tripod
Neewer lens heater (helpful in cold conditions; you’ll need a power source, like a power bank)
Lexar CFExpress Type A cards (the more memory, the better!!)
Neewer batteries and charger (I go through batteries when continuously taking photos)
Revo RBL-S remote shutter
REDUCE CAMERA SHAKE: Whether you’re using a camera or your phone, set a 2-second timer or, ideally, use a remote shutter to reduce any camera shake from pressing the shutter. If it’s windy, you may need to weigh down your tripod and use a longer timer, 5-10 seconds, to keep it as stable as possible. Another option is to set your camera to take interval images at an interval you choose. I like my camera constantly taking shots so I don’t miss a big flare up, as the lights change constantly, even if not to the naked eye. I have my camera set to take images every second, but it will take them at the speed of my shutter, so every 8 seconds, for example. Yes, this will take up a lot of memory, so memory cards with a lot of space are ideal. This is the best way to make a time lapse of the lights if that is your goal.
FOCUS: Set up your camera on your tripod with the lens, and turn it into manual focus. Use a star to fine tune the focus (this can take a few minutes, especially on a DSLR) and take test shots to verify it’s focused by zooming in when reviewing the photo. Once in focus, turn on your focus lock or tape your focus ring down, ideally with gaffer’s tape, but painter’s tape will also work. You’ll want to check your images periodically to ensure they’re still in focus, as even the smallest movement can sometimes change the focus.

The result of trying to use autofocus (on my Canon T7), before I knew better. ALL of the shots on my camera looked soft like this, despite using a tripod. Thankfully I was also taking photos with my phone, and those turned out better. They’re too grainy and poor quality to print, but great for social media, at least. 5/11/24
WHITE BALANCE: Put your camera in full manual mode and turn off auto white balance if it’s on. Adjust your white balance to your taste (I like 4000k for this). I like to shoot in RAW for more flexibility with editing, but if you won’t be doing much, if any, editing, you can shoot in JPEG.
APERTURE: Set your aperture (f number) as low as you can for that lens without losing quality (some lose quality as you get to the lowest numbers). This opens up the lens to bring in more light.
SHUTTER SPEED: Set your shutter speed for 6-10 seconds for lights far away and/or on the horizon and/or moving slowly, but if they’re fast moving and above you, you may want to go down to 2-4 seconds. Longer shutter speeds can blur the auroral lines, so don’t go longer than this for best results.
ISO: Adjust your ISO to what works for your setup and lighting. This will vary widely, but don’t be afraid to go to 1000 or more. The darker the skies, the higher the number you may need, but use the lowest number that will give you the image you want. Take some test shots at different numbers to see how they look.
Check your shots periodically to make sure they’re turning out okay and still in focus.
Most of all, enjoy the show and marvel at mother nature’s natural wonder!
The next natural step (after any editing) is to order some high-quality prints for yourself. I compared online printing houses for myself (I’ll create some content around that soon), and Printique is my printing house of choice. If you order any prints of my images from my website, they will be through Printique, and I’d recommend them for any you choose to order of your own images. The brilliance of color, the quality of the materials used and the delivery/packaging ensures, in my experience, that you will have images you love, and they will arrive in excellent condition.

Badlands National Park, 5/16/25- 8 seconds, f/1.4, ISO 4000

Explanations of the colors, source mprnews.org
Probability map 10/10/24

Incredibly ideal solar winds, 10/10/24

KP Index 10/10/24

10/10/24, Berryessa Snow Mountain National Monument, Lake County, California- 8 seconds, f/1.4, ISO 640